Problem:
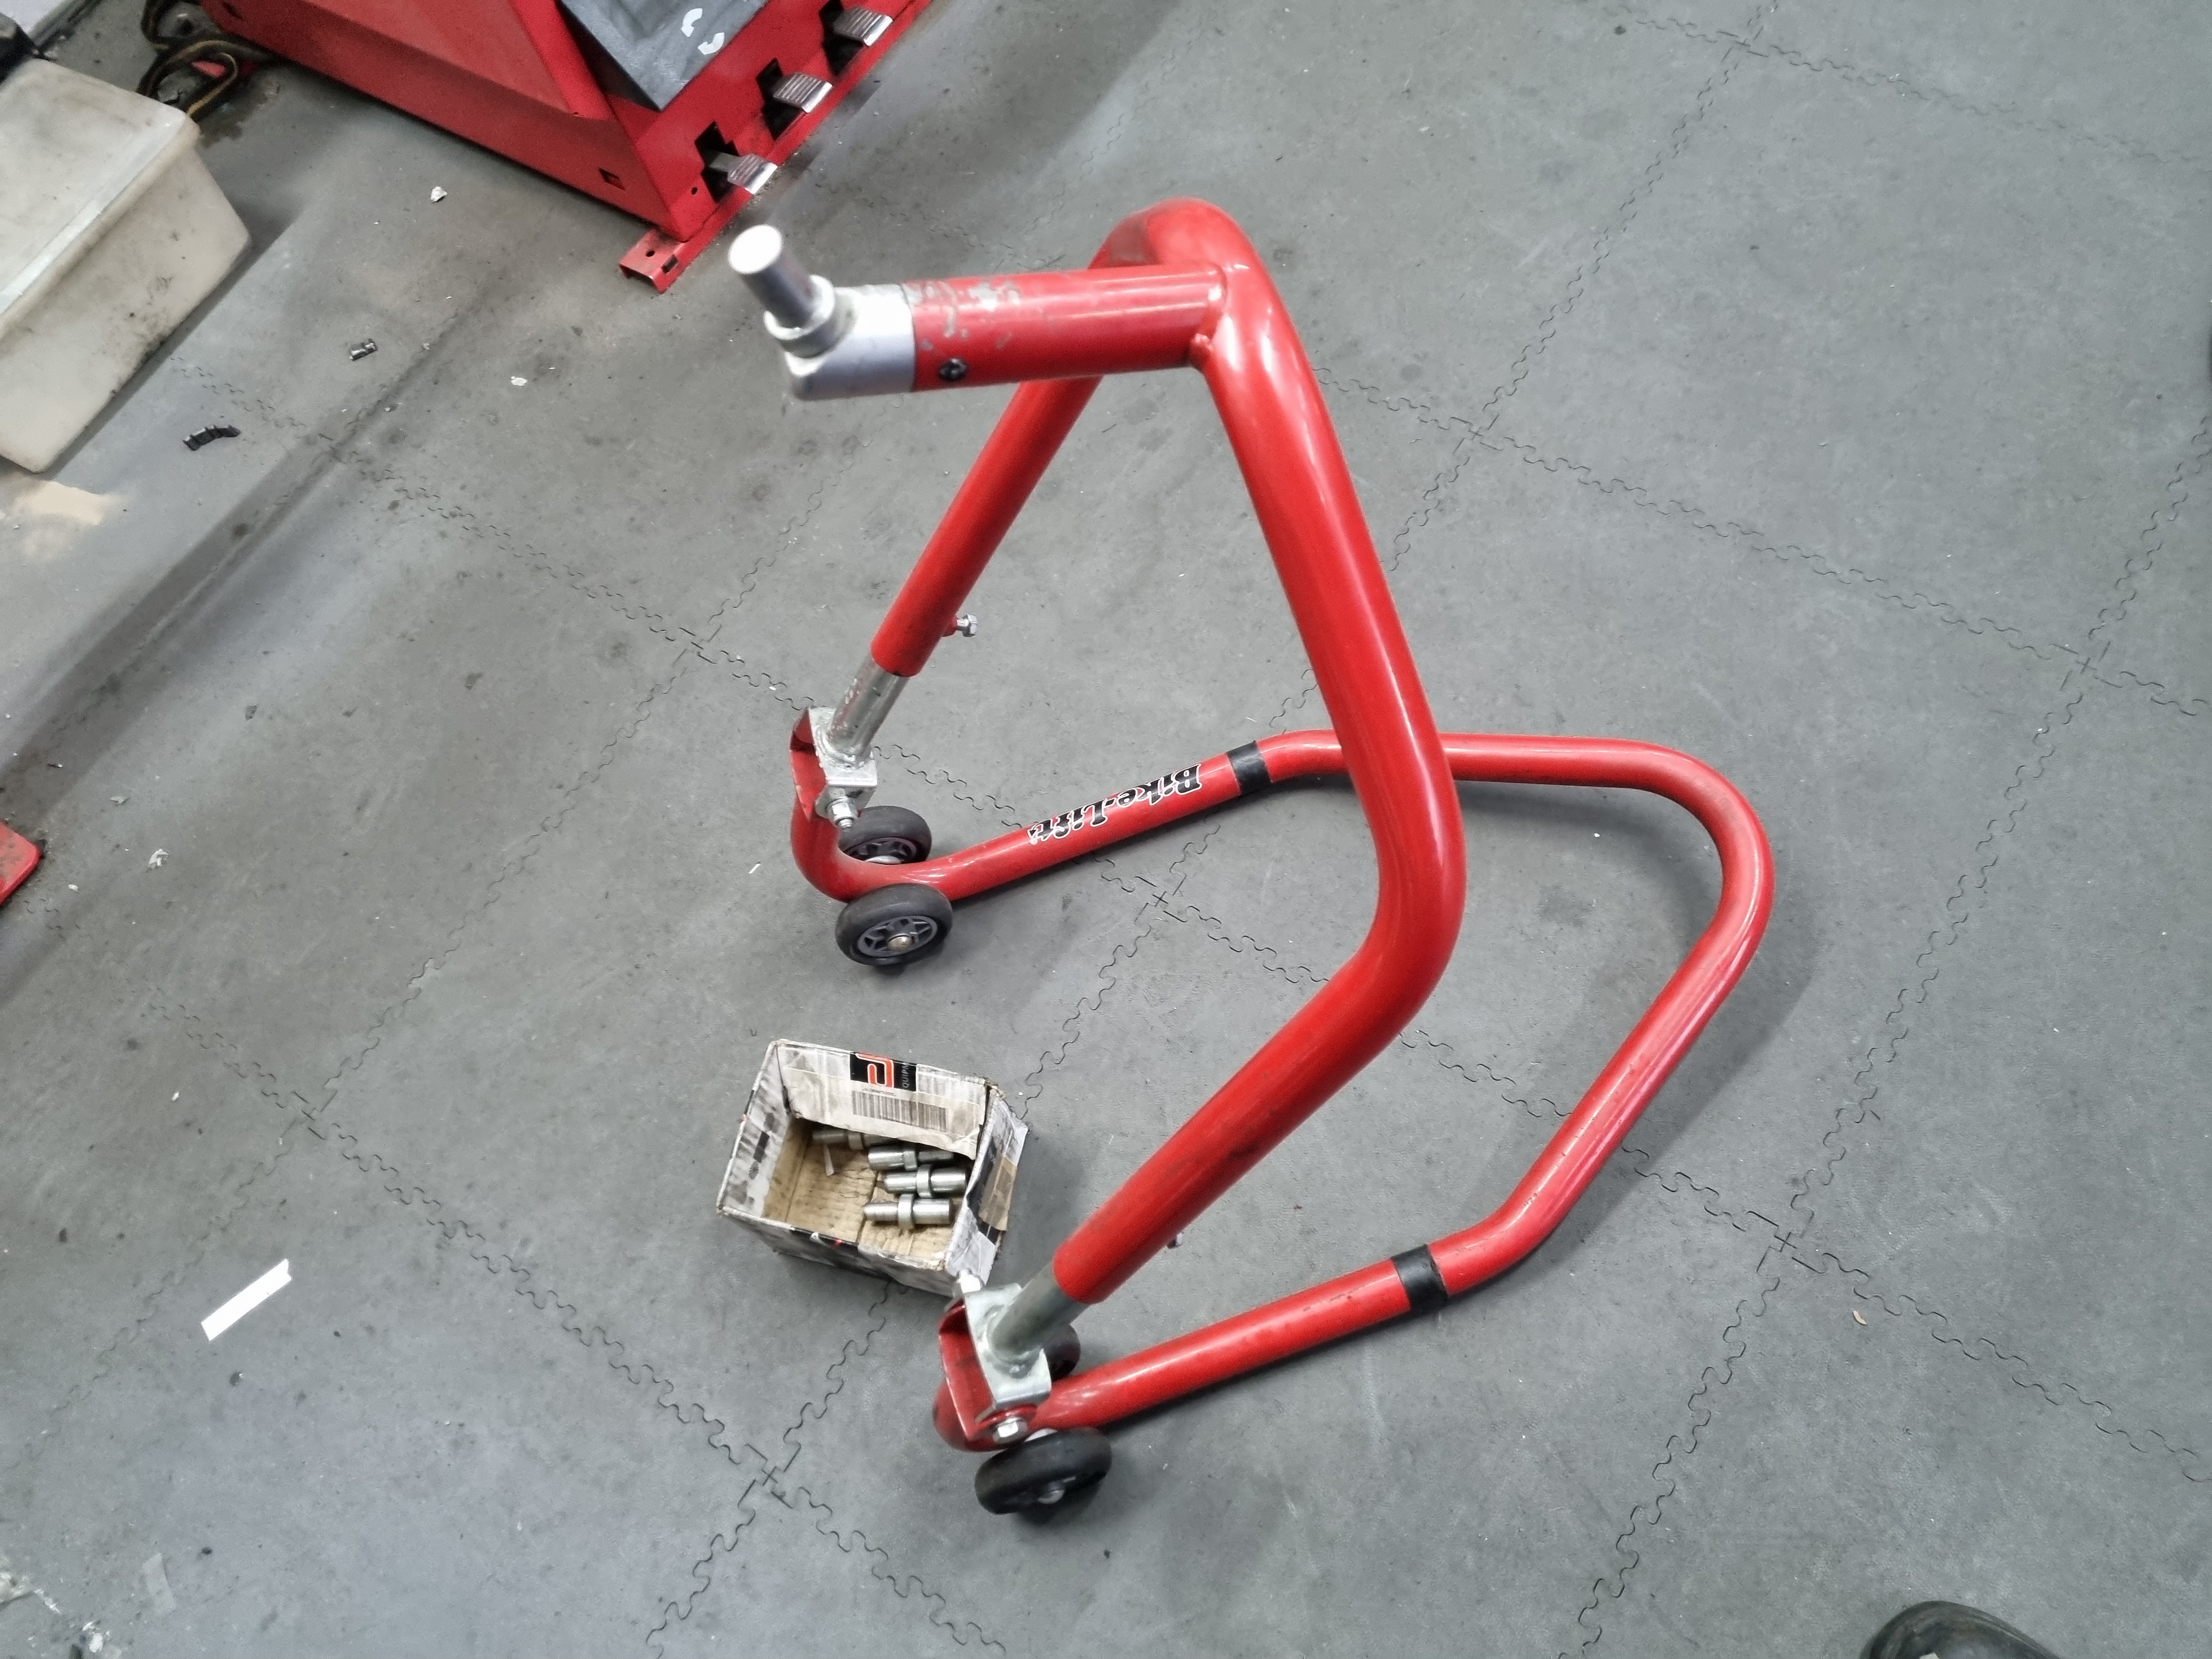
in my workshop I have a paddock stand that uses the balhead hole for lifting the front of the motorbike.
But obviously there are serveral diameters used by different brands and types of motorcycles, so I have 6 different adapters for this paddock stand.
These adapters are now just laying around in a cardboard box, and every time I require one, I go through the box, take one and see if it fits. If it doesn't fit it goes back in the box and I take another one till I have the correct one. But obviously, I sometimes have the same one in my hand several times and having these adapters just mingling in a cardbord box doesn't really look well either.
Solution:
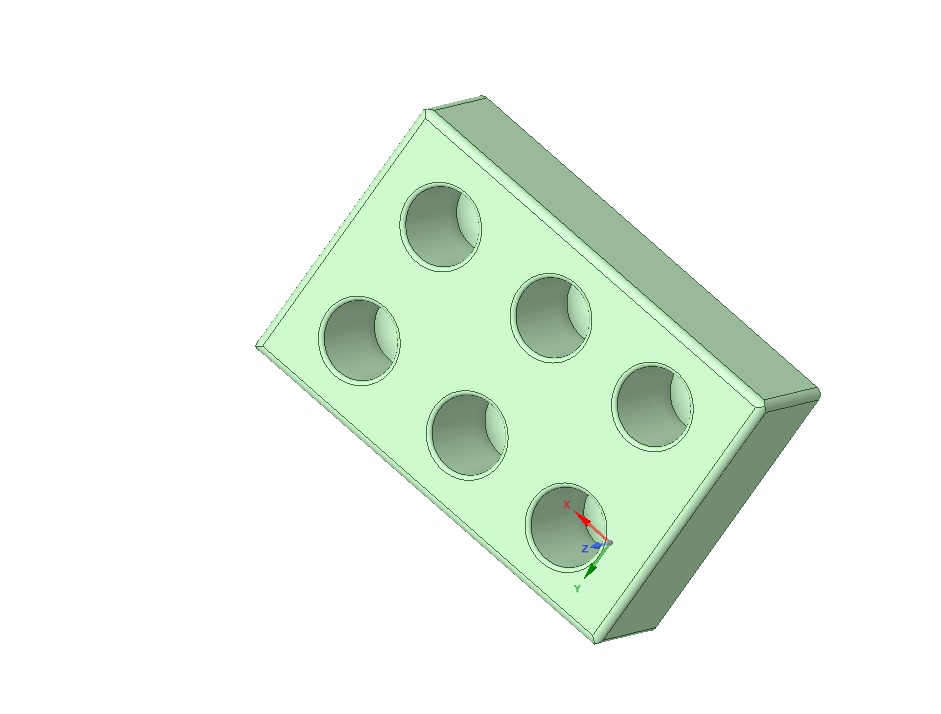
The solution is simple. A box where I can insert the different adapters so they don't mingle, and can be organised in order so it will be easier to pick the correct one.
Step 1:
As it is very unlikely that there is already a file out there that will work for me, and as this looks like a fairly easy project to start off with, the first step is to take measurements.
Measured the diameter of the part of the adapter to go into the paddock stand, measured the widest part of the widest adapter so I could calculate the complete size for the box and measuerd the hight of the part of the adapter that goes into the paddock stand so I can make my box deep enought to fit the adapters.
Step 2:
Design the part in the 3d designing software.
Some things I took into account : rounded edges, as you don't want to cut yourself on an edge and makes it easier to put the adapters back into their hole. Export the design for 3d printing, creating an STL file.
Step 3:
Slicing the STL file so it can be setup for printing.
Now this slicing part is something that one can make a complete degree on. A lot, and I do realy mean a lot of settings can be altered and I just looked around a bit, and did some small tweaks to the infill percentage (as I tend to make stuff overtight), wall thickness and for the rest I just let it al standard for PLA printing.
I guess this is the part of the process that most people will be spending their time to solve any printing issues.
Step 4:
Printing the file......, fingers crossed
(Forgot to take a picture while it was printing the file)
Step 5:
testing and using
After a 2 hour print, the box came out looking realy great
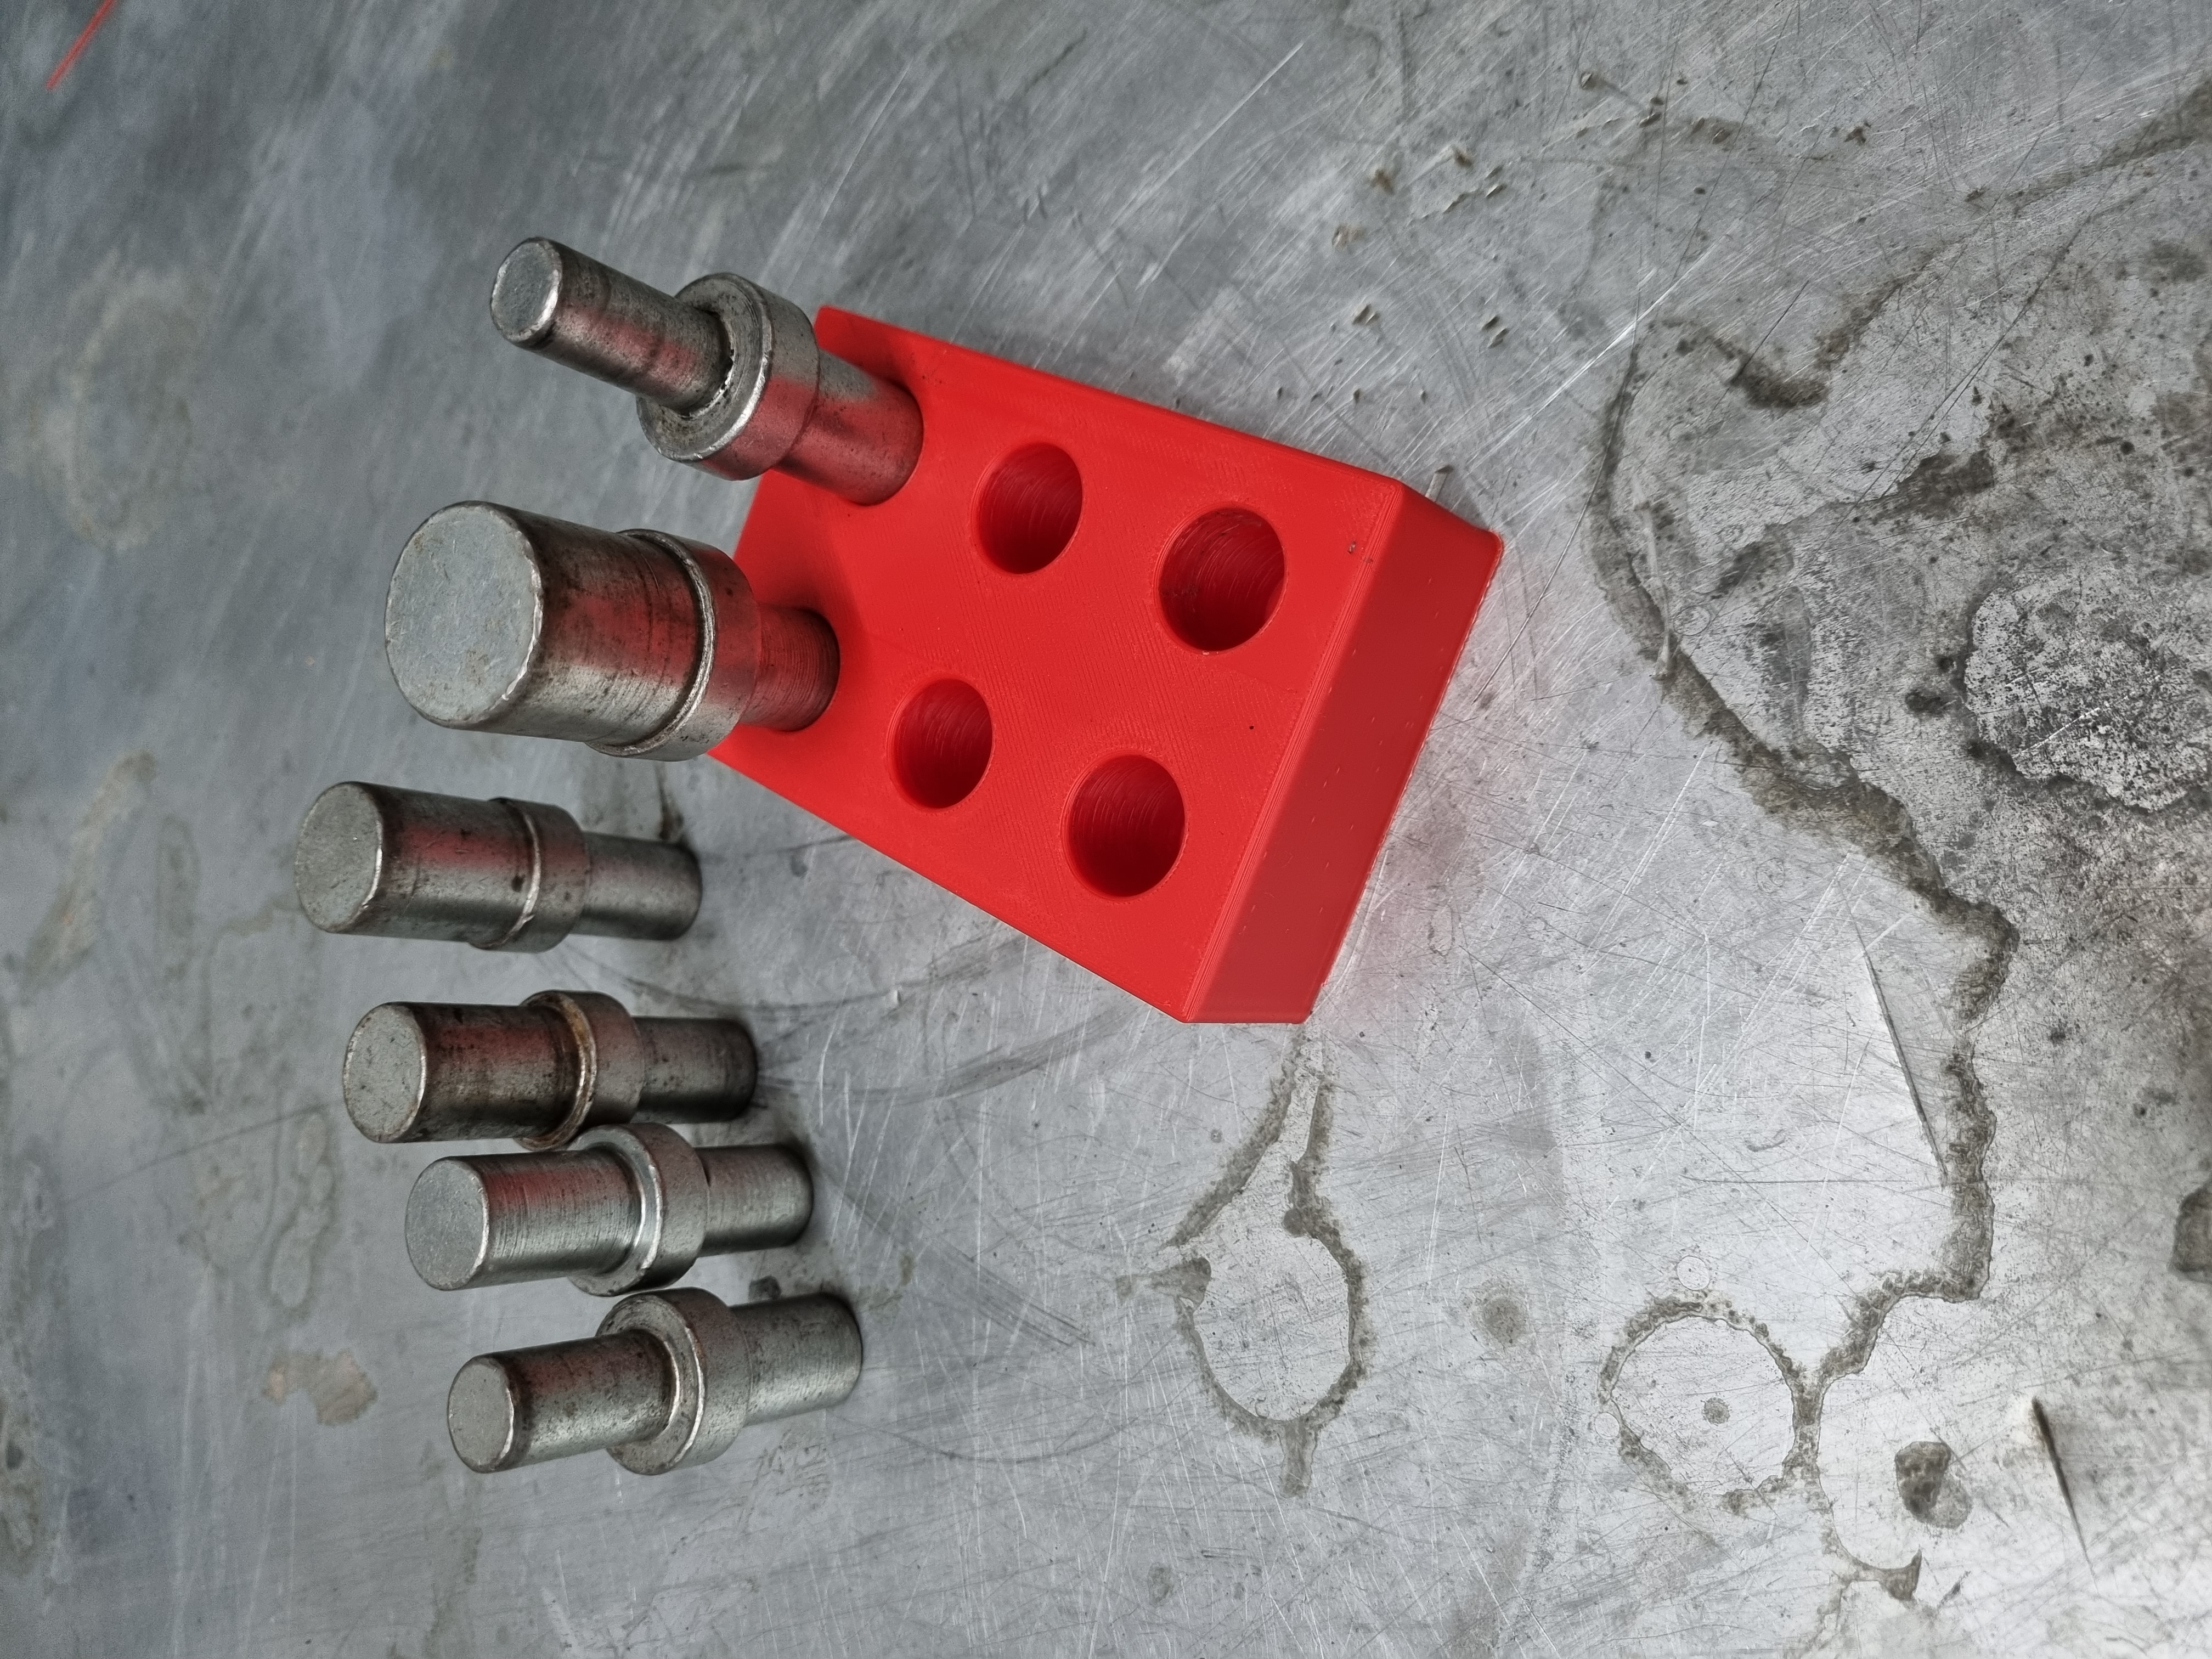
Unfortunately the holes are too tight. I can get the adapters in, but they fit so tight that I can't get them out easy enough. I will probably just sand them a bit to make them bigger, and if that fails or is too much of a job to get it right, go back to the design, change the margins a litle and print again.
UPDATE (Februari 7th 2025) : As changing the design could be done at home in 5 minutes, I changed the design, ran it through the slicer and sent it to the printer. That's way less work than trying to find the proper way to sand it down ..... (I'm also lasy apparently).
UPDATE (Februari 8th 2025) : The finished product
